Collections are a way of saving curated lists of annotated sequences, complete with assay data and other relevant sequence information. Once created, Collections can be searched against to identify whether there are any sequences closely related to your selected candidates.
Creating Collection Folder
The Collections feature can be found under the "Reference Sequences" section of the folder tree. Collections folders can be created in order to better organise your Collections. By default, all Collections will be able to be accessed by everyone in your organisation.
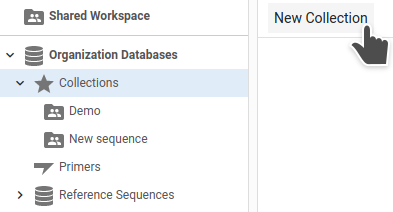
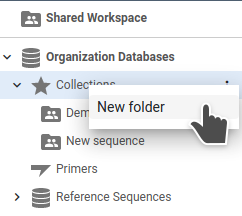
Collection folders can be created via either the Collection's page:
or the Collection action menu:
Creating a Collection
Any number of Collections can then be created from a Collection Folder. Creating a Collection involves 4 steps:
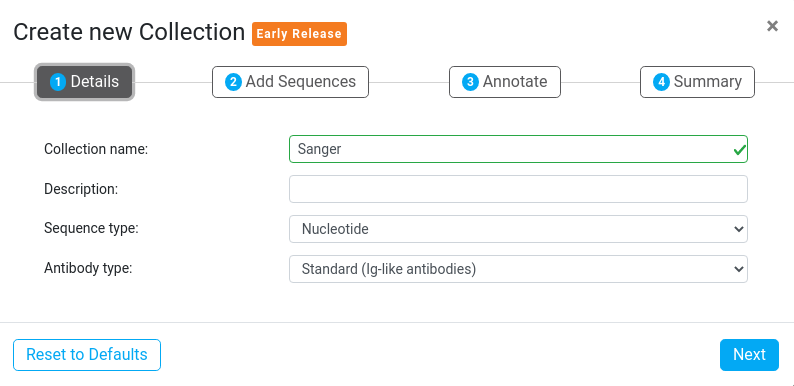
1. Set your Collection Name and Type
This step allows you to set details such as the Collection name, Description, Sequence type and Antibody type.
Sequence type defines the sequence alphabet allowed in this Collection. Sequences in Collections can have either a Nucleotide or Amino Acid basis, but Nucleotide and Protein sequences can't be mixed in the same Collection.
Antibody type defines the type of sequences allowed in this Collection to be either Standard (Ig-like antibodies) or Non-Standard (Scaffold peptide) antibodies. Most users will have sequences with the standard FR/CDR antibody regions, as analysed by the Antibody Annotator.
2. Add Sequences (Optional)
The Add Sequences step allows you to select initial sequences to import into the Collection. These sequences or sequence lists can be selected individually via a representation of the Folder Tree. The list will only show sequences of the Sequence type chosen in Step 1 above. Adding sequences at this stage is best for sequences that need to be annotated with standard antibody regions. If you have pre-annotated sequences (including non-standard antibody sequences) you can add them from your Annotation Result documents later.
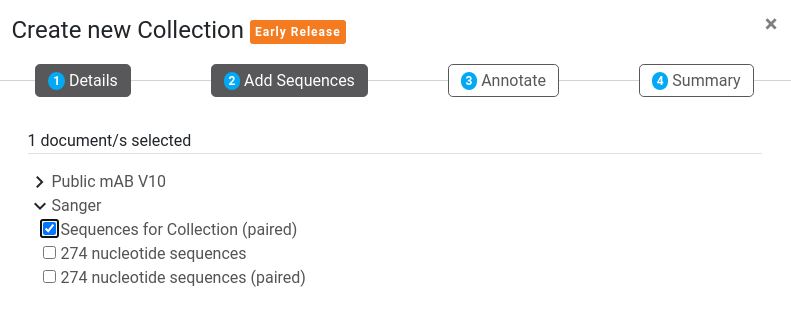
Tip: If you have multiple individual sequences, we recommend using the Group Sequences operation to group them into a single list first.
3. Annotate (Optional)
The Annotate step is only needed if sequences were selected in the previous step.
This step uses the Antibody Annotator pipeline to annotate the selected sequences, as sequences in a Collection are expected to be annotated with the relevant regions. For more details on the annotation options shown below, please refer to the Antibody Annotator help article.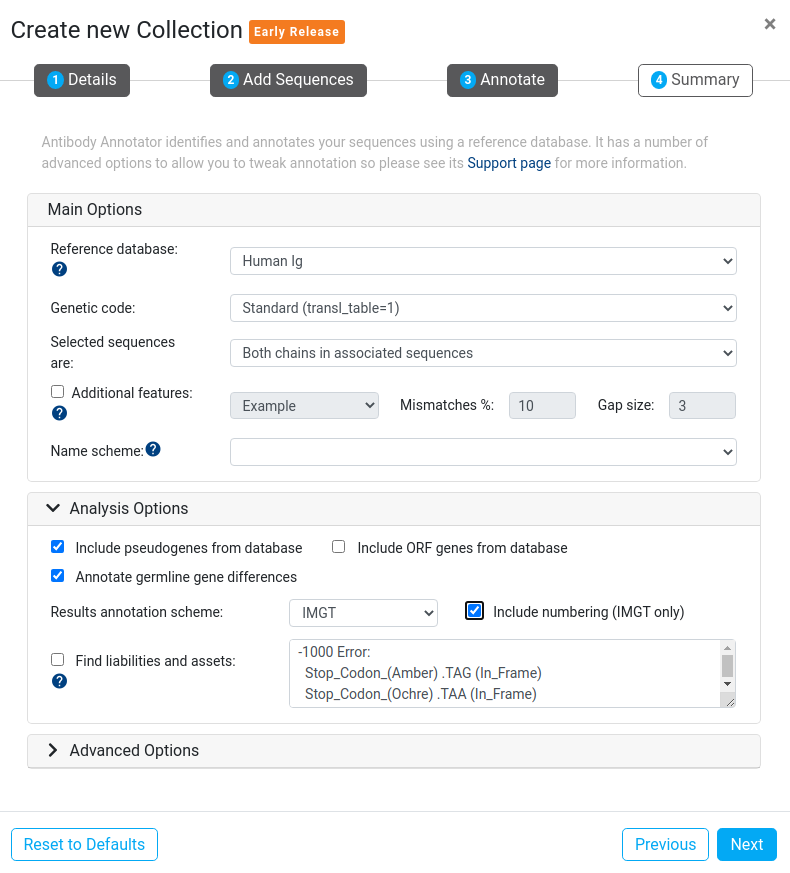
4. Summary
The Summary step shows a brief summary of information from the previous steps. From here you can go back to change your settings, or click the Run button to begin the process of creating your new Collection.
What next?
Once you have created your collection you can continue to enrich it in the following ways:
- Add physicochemical data to your Collection sequences using the Add Assay Data tool
- Add your own labels and free text notes to the Collection sequences
- Add more new (unannotated) sequences directly from the Collections view
- Add sequences from your existing Annotator Results.
Collections can be searched from within Antibody Annotator, Single Clone, and Scaffold Annotator Results. For more information about searching for sequence matches, see the Searching a Collection article.
